



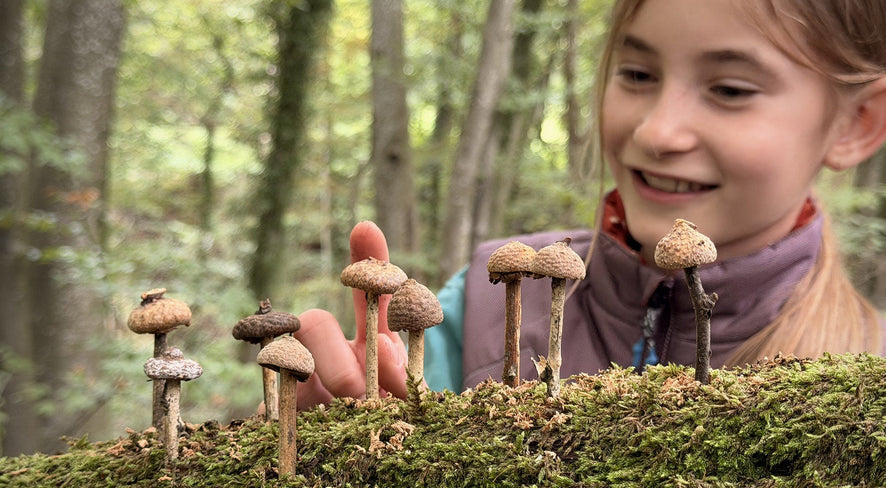
Autumn has a light all of its own. When the sun shines low through the trees and the leaves rustle underfoot, many of us feel drawn into the woods. It’s the season where we spot real mushrooms growing along the path – or, even better, we can let our own little family of mushrooms pop up in the forest.
This crafting idea from Gabrielle at kindwaldundwiese turns an ordinary family walk into a mini creative adventure. The best part? We don’t need any glue or string. Everything we use can be found right there in the woods.
An adventure for big and small forest explorers
What makes this project so great is how effortlessly it works – no big prep needed. It’s ideal for kids from around three or four years old, but older ones will love it just as much. Whether the finished mushrooms end up standing straight, leaning a bit crookedly, or wearing a lopsided cap doesn't matter at all. In fact, it’s those tiny imperfections that bring the whole mushroom scene to life.

What you need
For your forest mushrooms, you’ll only need a few simple materials and a tiny bit of tool help:
- Acorn caps in various shapes and sizes (you might even spot caps from different oak species, like red oak or pedunculate oak)
- Small twigs and branches, ideally a bit bent or knobbly
- A bit of damp, clay-like earth
- A decaying log or tree stump with sturdy deadwood – ideally with a nice patch of moss on top
- A small hand drill or chestnut drill
How it’s done: Step by step to a little forest artwork
1. Head out on a treasure hunt
As you walk, gather a variety of acorn caps and small twigs. The more twisted and unique the twigs are, the more natural your little mushroom group will look later on.

2. Drill holes into the deadwood
Find a fallen, decaying log or an old tree stump. Using your hand drill, carefully bore a few holes next to one another.
Important note: We only drill into deadwood, never into living trees! Make sure the log is resting securely and won't roll away.

3. Set the mushroom stems
Now pop your collected twigs into the drilled holes. Trimming or snapping the twigs to different lengths creates mushrooms growing at all different heights.

4. Shape the mushroom caps
Pack a little damp, clayish soil into the acorn caps and gently press them onto the exposed tops of the twigs. The wet soil acts as a natural binder and holds the cap securely on the stem. If the soil on site is a bit dry, a tiny drop of water from your drink bottle works wonders.

5. Watch a little mushroom scene grow
Now you can arrange things to your heart's content. Maybe two mushrooms nestle close together, while another stands slightly apart? A touch of moss tucked around the base finishes off your little woodland creation.

Room for trying things out
When crafting outdoors, it's never about making everything look perfect. The process itself is what matters. Kids get to experiment, figure things out, and find their own solutions. What if an acorn cap wobbles? Or the hole in the wood turns out a little too big? You figure it out together, pack in a bit more soil, or look for a slightly thicker stick.
“I love giving kids the freedom to do as much as possible themselves,” says Gabrielle. “Drilling, picking materials, and fitting them together gives them a genuine sense of accomplishment.” And sometimes, a small spark of creativity leads to much more: after making the mushrooms, Gabrielle’s youngest stayed busy playing with the damp clay for hours, eventually building his very own little seat out of it.

More than just a craft project
Working with natural materials naturally builds fine motor skills and coordination. But even more meaningful is the gentle mindfulness it invites: Who actually lives inside this old log? What does moss need to thrive? We take a closer look, ask questions, and learn to understand nature a little better. During their time in the woods, Gabrielle and her kids were even greeted by a real fire salamander!
The sweetest part of this project comes at the very end: your mushrooms simply stay right where you made them. When another family wanders through the woods a few days later, a child might stop in front of your log, look closely, and smile at the little surprise left behind.
So, on your next forest walk, grab a small hand drill, keep an eye out for acorn caps, and let your own little mushroom landscape grow!